Your basket is empty.
Continue Shopping
Simple Knot Bag
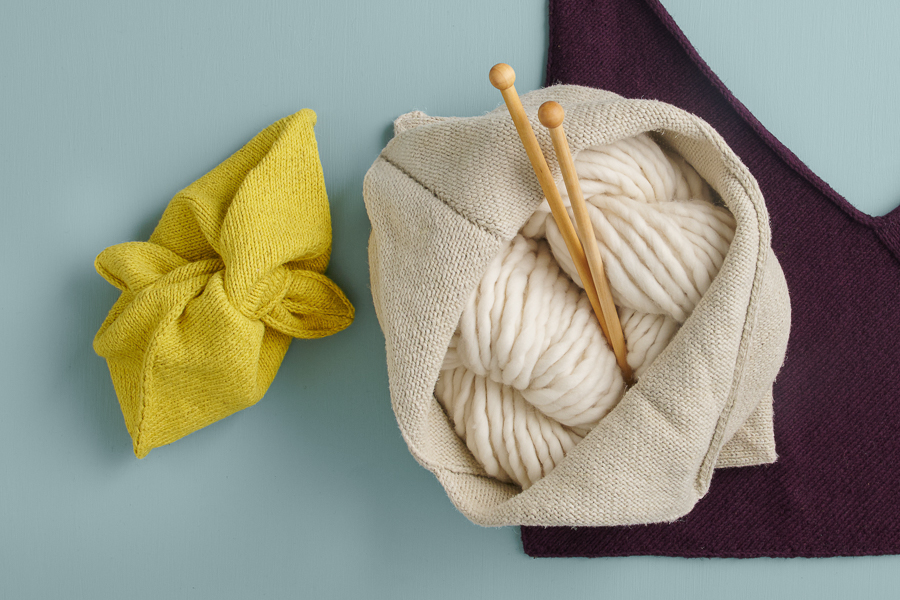
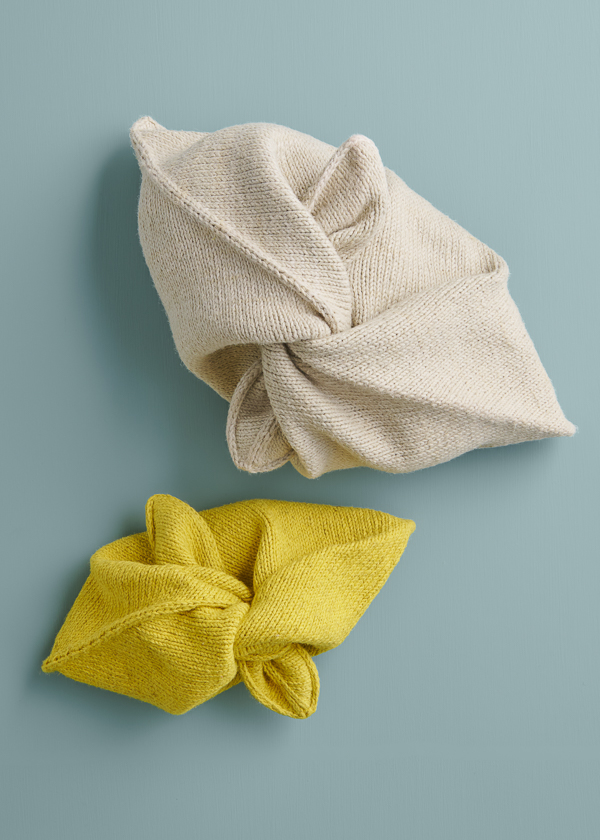
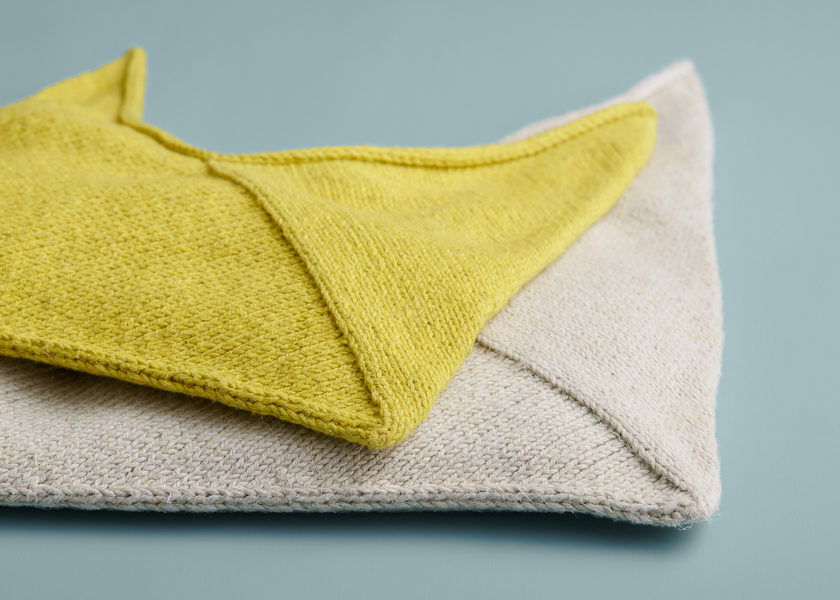
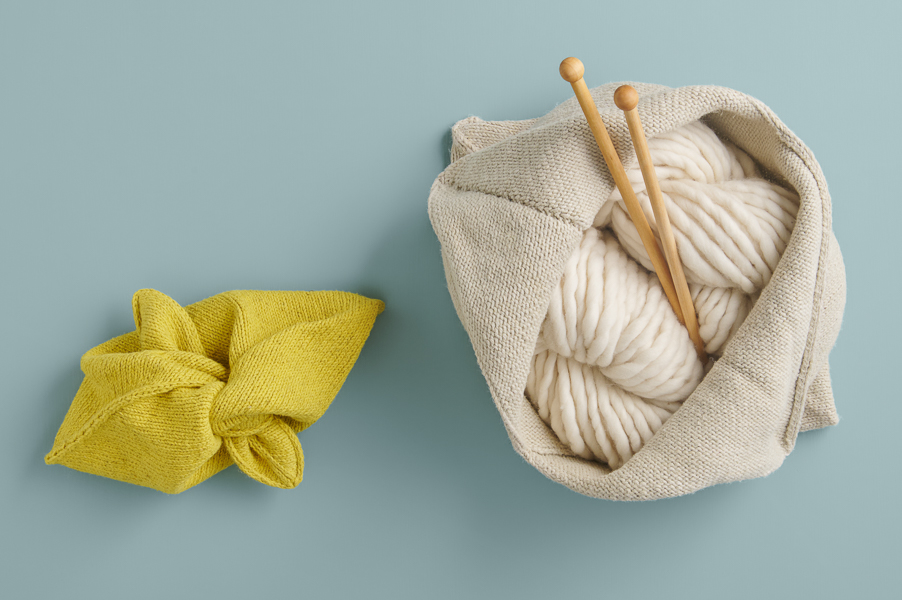
A cute and clever little take-along, our Simple Knot Bag pattern ties snugly around anything from a knitting project to a tasty snack. Choose from three sizes, and cast on with our new Field Notes yarn, a mix of hemp and cotton that is earthy, elegant, and totally beautiful.
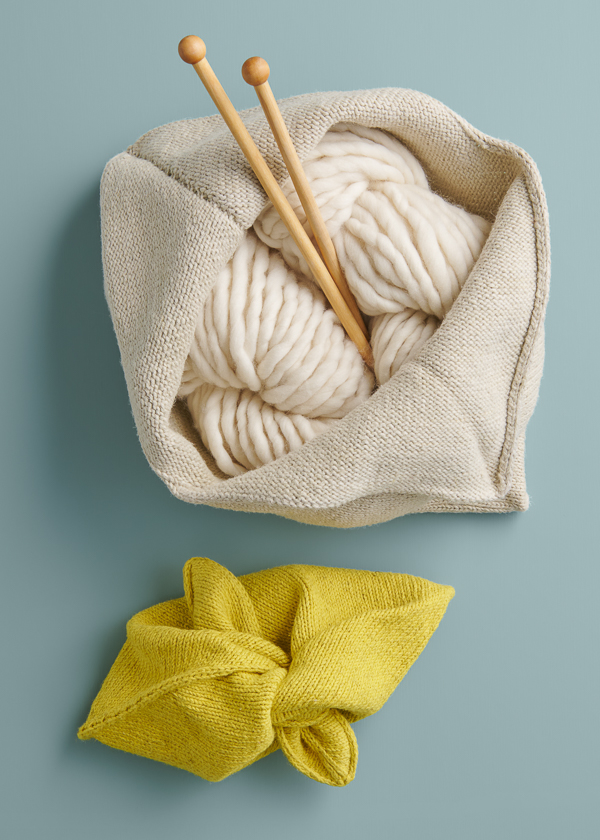
The shape of this bag is called an “azuma bukuro” in Japanese, a traditional cloth bag secured with a knot. We wanted to see if we could knit this shape without any seaming, and we found a simple and satisfying way to do it. All easy knitting, with step-by-step photos to guide you along the way, but a fun brain-tickler to see how it comes together!
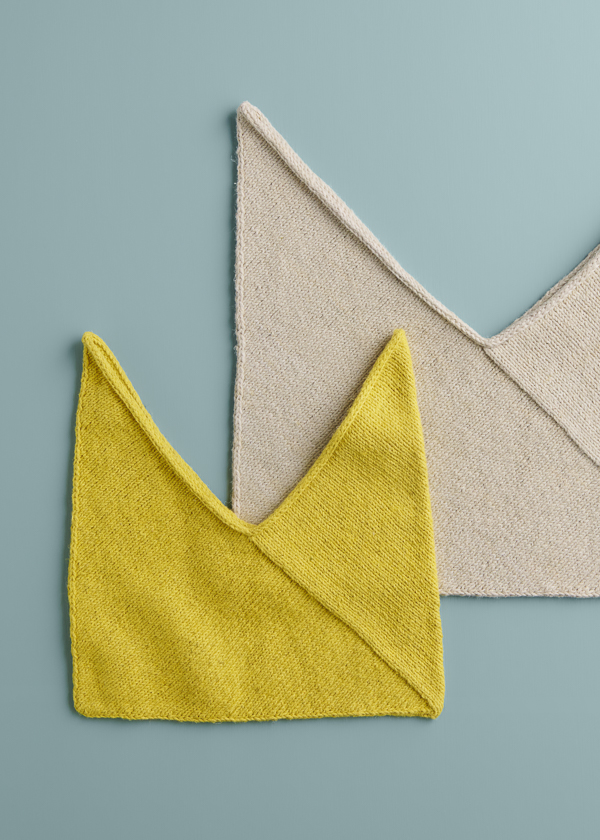
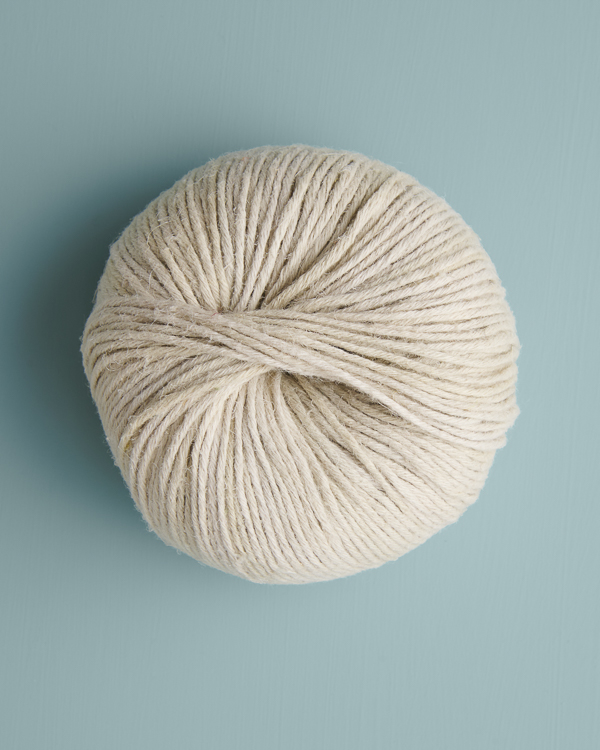
Knitting the Simple Knot Bag is a journey full of happy discoveries, and Field Notes is a lovely companion—soft, supple, and absolutely gorgeous on the needles. This DK-weight yarn is half French hemp and half rare Sicilian cotton, the perfect balance between hearty, rustic character and remarkable softness. A robust multi-ply structure and sturdy plant-based fibers make your bag easy to care for and even machine-washable.
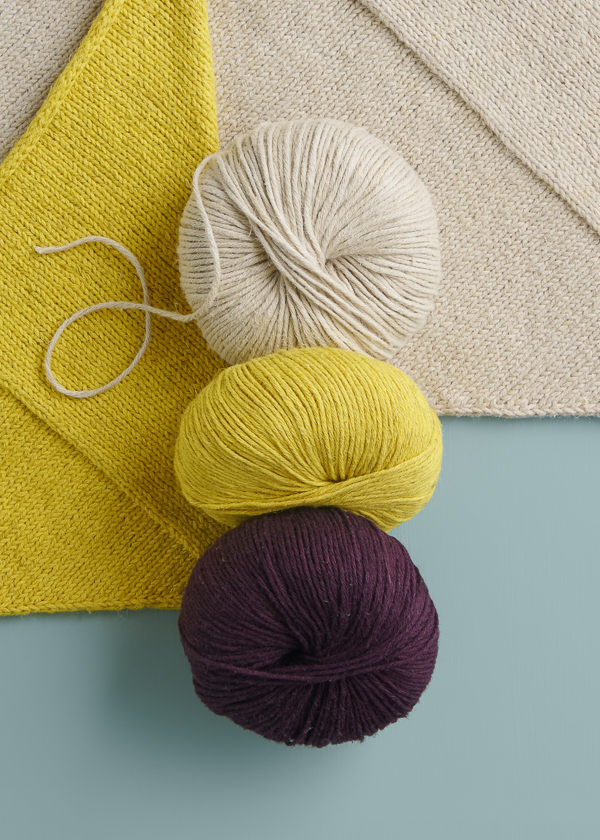
This yarn truly shines in stockinette, the ideal showcase for its handsome hempen texture. Pick from a palette of rich colors: warm Stepping Stone, bright Yellow Zest, deep Fresh Huckleberry, and more. You’ll need two balls of Field Notes for the smallest size, three for the medium size, and five for the largest.
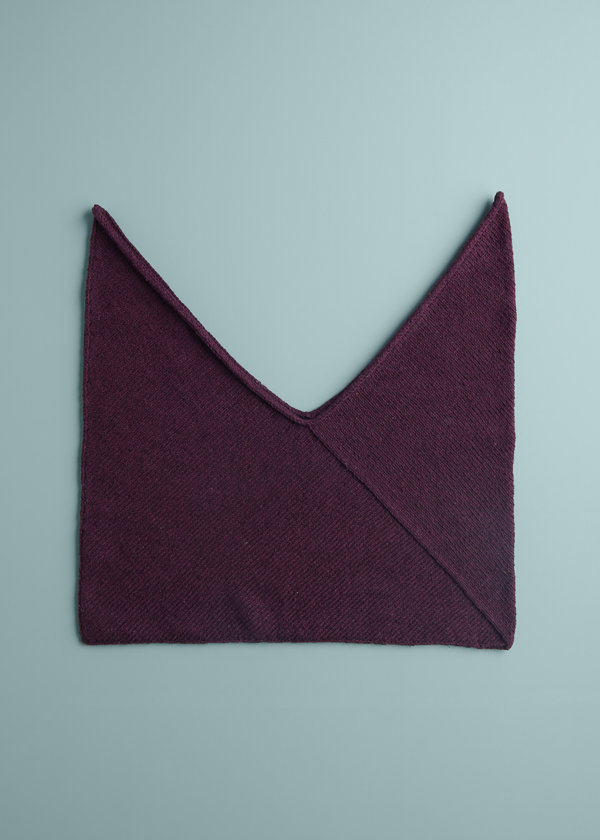
Whether tucked under your arm or into another bag as an interior organizer, the Simple Knot Bag is so handy and helpful that you’ll just have to make one in each size!
Yarn lovers, if you adore the yarn used in this project, you’ll love exploring all of our other yarn collections! Discover over 55 thoughtfully designed yarns in nearly every natural fiber and in every spectacular color you can imagine. Only available here at Purl Soho’s online yarn store, where every skein is created with care and your creativity in mind!
Pattern designed and written by Purl Soho designer, Hiromi Glover. See even more of Hiromi’s work on her Instagram!
Story written by Andrea Lotz for Purl Soho.
Want to print this pattern? On desktop, find the “print” icon in the right margin, and on mobile, scroll to the end of the pattern for it. Use the on-screen instructions to remove anything you don’t want to print!
Materials
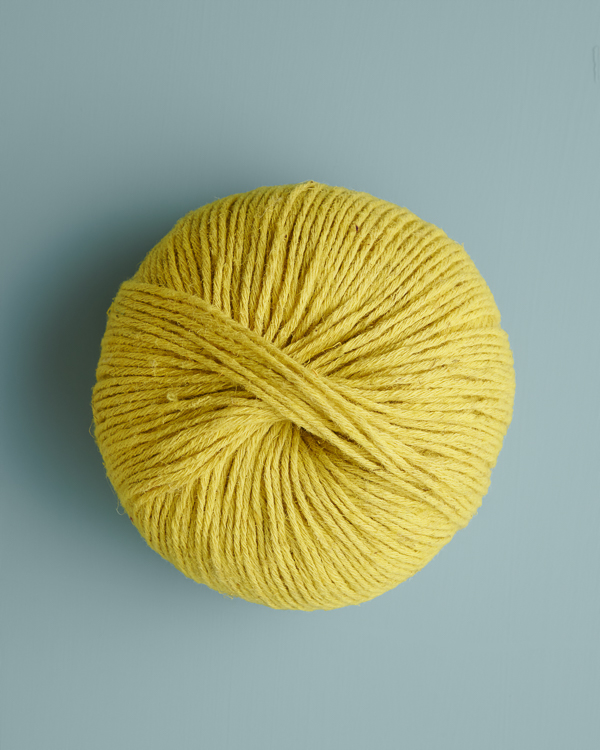
- 2 (3, 5) balls of Purl Soho’s Field Notes, 50% Sicilian cotton and 50% hemp. Each ball of this light worsted/DK-weight yarn is 104 yards/ 50 grams; approximately 190 (312, 510) total yards required. We used Yellow Zest, Stepping Stone, and Fresh Huckleberry.
- US 4 (3.5 mm) circular knitting needles, 24-inch for Small and Medium sizes or 32-inch for Large size
- A set of US 4 double pointed needles OR US 4, 32-inch circular needles for Magic Loop
- Stitch markers, including one unique
NOTE: We used every last yard for the Medium size! To avoid running short, be sure to check your gauge, reuse your swatch yarn, and keep tails short. Or, consider ordering an extra ball just for swatching. If you don’t end up needing it, you can return it for a refund within 30 days of purchase, or within 6 months, for store credit. Our Return Policy has all the details!
GAUGE
24 stitches and 36 rows = 4 inches in stockinette stitch
SIZES
Small (Medium, Large)
- Finished Circumference: 22½ (28½, 37) inches
- Finished Height at Corners: 11½ (14½, 18¾) inches
- Finished Height at Center: 5¾ (7¼, 9½) inches
SAMPLES: The Yellow Zest bag is the Small size, the Stepping Stone bag is the Medium size, and the Fresh Huckleberry bag is the Large size.
NOTE
Construction
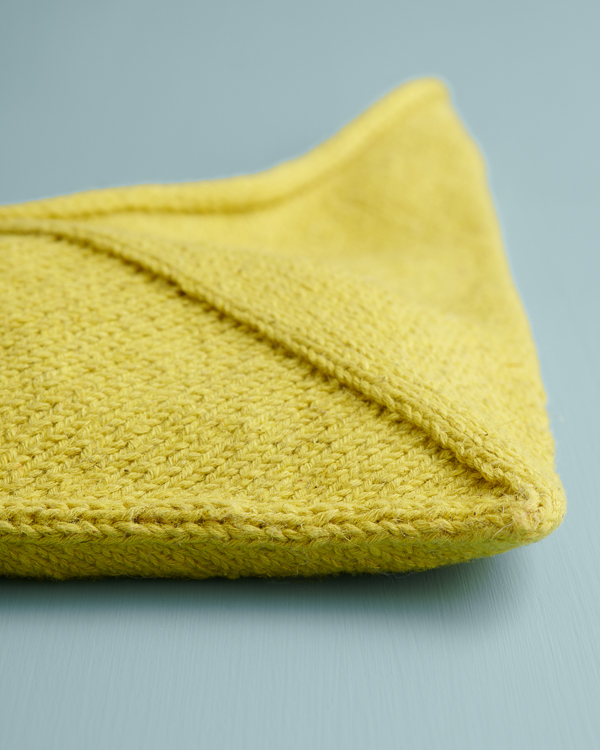
First, you will knit a square. Next, you will use a cable cast on to add new stitches, then pick up and knit stitches along one edge of the square. You will join these stitches in the round, which folds the square in half along its diagonal to create one bottom corner, then work decreases to create the other bottom corner. You will finish by picking up around the edge and working an I-Cord Bind Off. Don’t worry, there are photos along the way to help you visualize!
PATTERN
WORK SQUARE
Cast on 48 (60, 78) stitches onto circular needles. We used a basic Long Tail Cast On.
Do not join to work in the round.
Set-Up Row (wrong side): Purl to end of row, place a removable stitch marker on last stitch worked.
Row 1 (right side): Knit to end of row.
Row 2 (wrong side): Purl to end of row.
Continue in stockinette stitch, repeating Rows 1 and 2, until piece measures 8 (10, 13) inches from cast-on edge, ending with a right-side row.
PICK UP + JOIN IN ROUND
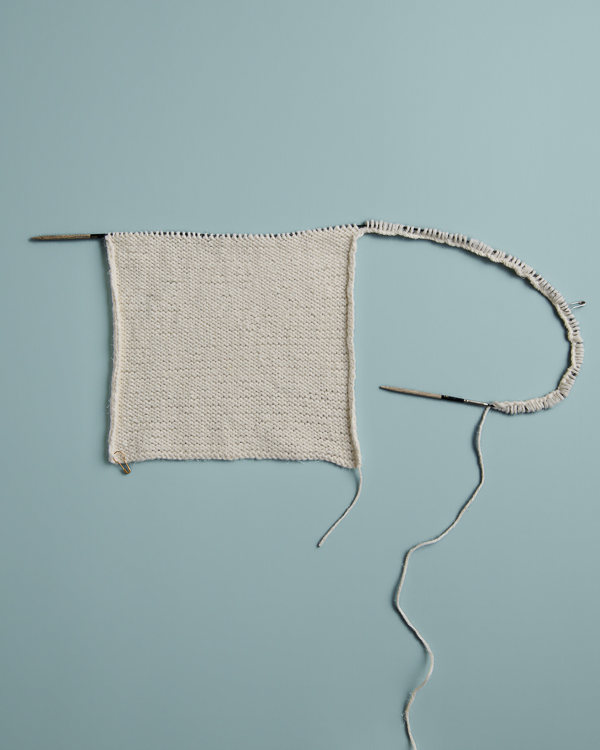
Turn work so wrong side is facing you and cable cast on 48 (60, 78) stitches, place marker, and cable cast on 48 (60, 78) more stitches.
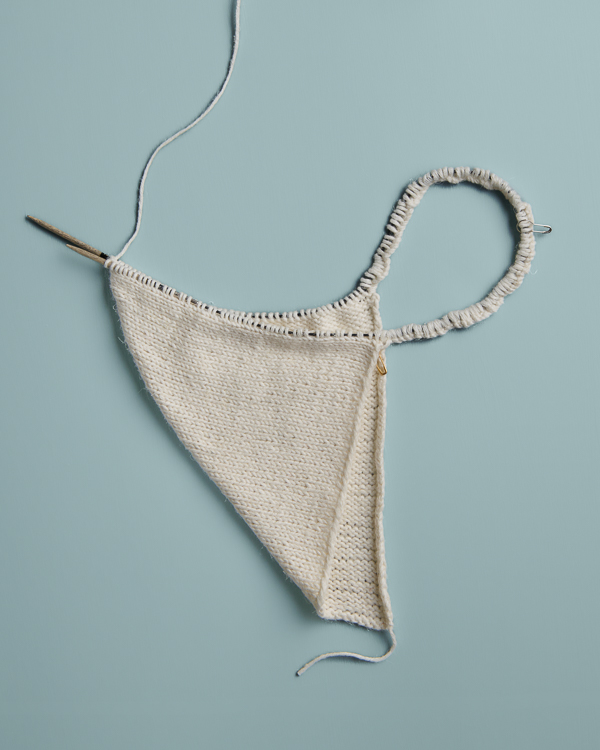
Without turning work, fold bottom left corner to top right corner so wrong sides are facing each other, forming a triangle. Then, being careful not to twist the stitches and starting at removable stitch marker, pick up and knit 48 (60, 78) stitches along selvage edge, at a rate of approximately 2 stitches per 3 rows. [192 (240, 312) total stitches]
NOTE: For help with picking up stitches, please visit our Picking Up Stitches Tutorial and scroll down the page to the Along A Vertical Edge: Stockinette Stitch section.
Remove removable stitch marker.
Place unique marker and join for working in the round.
DECREASE
NOTE: If using 24-inch circular needles, switch to double pointed needles when necessary.
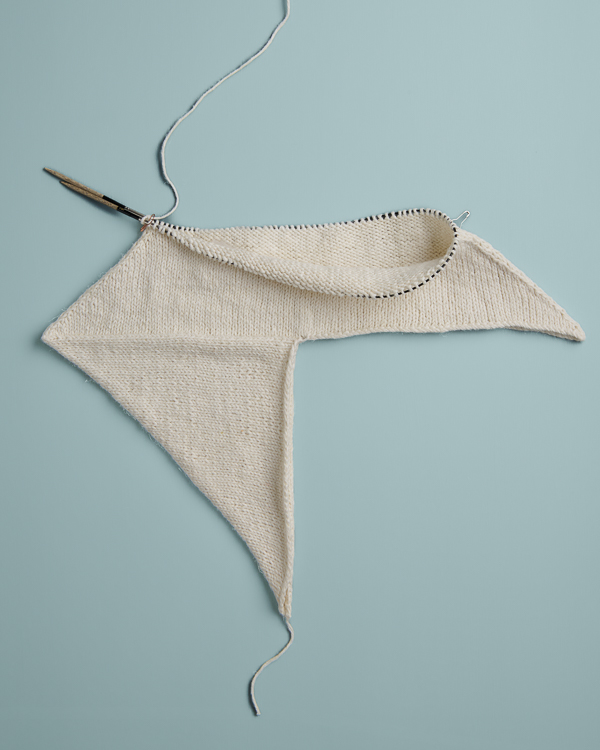
Rounds 1 and 2: [Slip slip knit, knit to 2 stitches before next marker, knit 2 together, slip marker] 2 times. [4 stitches decreased]
Round 3: Knit to end of round, slipping markers as you come to them.
Repeat Rounds 1–3 twenty-two (28, 37) more times. [8 stitches remain]
Repeat Round 1 one more time, removing markers as you come to them. [4 stitches remain]
Cut yarn and thread tail onto a tapestry needle. Draw needle through remaining stitches, pull taut, and bring tail to inside of bag to weave in.
FINISHING
With 24-inch circular needles for Small + Medium sizes or 32-inch circular needles for Large size, cast on 2 stitches. Then beginning at either pointed tip along selvage edge of bag, pick up and knit around the bag opening at a rate of approximately 2 stitches per 3 rows along vertical selvages and every stitch along horizontal cast-on edges.
Join for working in the round and bind off picked-up stitches using an I-Cord Bind Off.
NOTE: For help, please visit our I-Cord Bind Off Tutorial.
Weave in the ends and gently wet block.
Share your progress and connect with the community by tagging your pics with #PurlSoho. We can’t wait to see what you make!
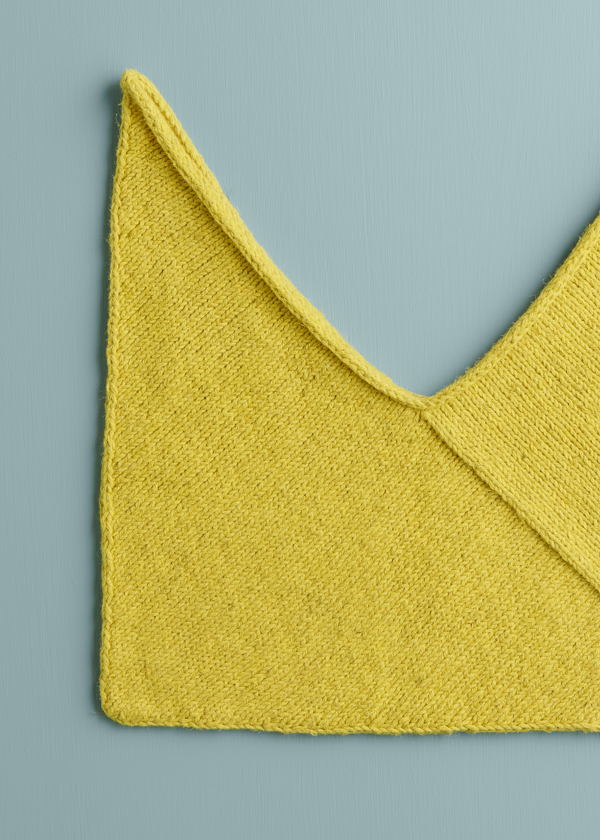
Learn About Field Notes + All Our Beautiful Yarns
Wild and earthy, artistic and elegant, Field Notes brings an adventurous summertime spirit to this project. A DK-weight yarn made in Italy with a 50/50 mix of French hemp and rare Sicilian cotton, Field Notes has a handsome hempen texture and surprising softness, with an appealing matte finish to every rich, beautiful color. This plant-based yarn is conveniently machine-washable, too… Amazing for so many things you’ll want to knit!
More Free Knitting Patterns
- Be sure to explore our collection of Field Notes knitting patterns and cast on!
More Light Worsted/DK-Weight Yarns
- Shop our entire collection of light worsted/DK-weight yarns (What does DK-weight yarn mean, really? Our guide to DK yarn will answer your questions and demystify.)
- If you want to use a different yarn, be sure to take the time to get the correct gauge. Need help? Check our All About Gauge Tutorial, our Yarn Substitution article, and our Complete Guide To Yarn for lots of helpful information.
More Yarns With Similar Fibers
- Shop cotton yarn (What helps cotton keep its cool? Learn all about this soft, natural fiber in our guide to cotton yarn!)
- Shop hemp yarn
- Shop machine-washable yarn
- Shop plant-based yarn
Looking for more inspiration? Explore all of our knitting patterns (including tons of free knitting patterns) and knitting tutorials, buy one of our many knitting kits and yarn bundles, and shop for beautiful yarn. We have over 55 gorgeous natural fiber yarns in 100’s of magnificent colors, designed to bring integrity, beauty, and joy to your next knitting project and only available at Purl Soho!

So cool! I love the way it comes together, what a clever design. Thank you yet again dear Purl Soho people, for your amazing website and yarns. I just received my Nigh, and oh man, I don’t think I’ve ever felt a cashmere this good.
Hi Francesca,
I’m so glad to see you’re loving the Simple Knot Bag design and your yarn! Thank you so much for your kind words.
Please feel free to reach back out here if you have any questions!
Happy knitting,
Hills
Absolutely a favorite. Thank you!
Thank you so much, Nina! We’re so glad you’re loving this pattern.
Please feel free to reach out with any questions you might have as you work!
Happy knitting,
Hills
Jumped right in with the Field Notes yarn for the small size bag. But whoa! I get 5 st/in with #4 needles. And only 5.5 st/in with #2 needles knitting flat and unblocked. Anybody else starin’ down the barrel of #1 needles??
Hi Kath,
I’m so sorry to read that you’ve run into some trouble here!
It may be possible you might make gauge once the swatch is blocked. Especially if you dry it in the machine. Our gauge measurements are listed for blocked swatches, if that’s helpful! However, we would love to take a look! Would you kindly send us a photo of your work (with a ruler in the image) to [email protected]?
Thank you so much in advance… We’re eager to help get to the bottom of this!
Kindly,
Hills
I’m confused with the decrease rows.
Is this correct?
R1 {SSK, knit to 2 stitches before marker, P2TOG} 2 times, then knit 96 stitches to end of row (4 stitches decreased)
R2 same as R1
R3 KNIT
I assumed 4 markers with 48 stitches between. But is it just 2 markers with 96 stitches between?
Hi Rita,
I’m so sorry to read that you’ve run into a bit of a hiccup here, and I’m happy to help!
Here are the rounds for your ease:
It looks like you’re correct in your understanding of these rounds…great work! The image just before you work on this section should show you where your markers ought to be. It looks like there are only 2 markers!
I hope this is helpful and that you enjoy the rest of your Simple Knot Bag project! Please reach back out anytime.
Kindly,
Hills
Repeat Rounds 1–3 twenty-two (28, 37) more times. [8 stitches remain]
Repeat Round 1 one more time, removing markers as you come to them. [4 stitches remain]
I am making the medium sized bag and having trouble with the gauge. I tried different sized needles and still had trouble, so I decreased the number of stitches from 60 to 54.(about 1 inch) I think I should have an equal number of stitches in eaqh of the four sections when I am decreasing. However, if you decrease 1 stitch with an SSK and then decrease another stitch with a K2tog before the first marker, you have decreased two stitches in the first section. Will this throw off the finished product?
Hi Jean,
I’m so sorry that you’ve run into some trouble here!
Our gauge measurements are listed for blocked swatches that have been washed and dried. This can make a big difference in gauge measurements! Would you mind sharing the stitch count you’re getting at the different needle sizes you’ve tried? Having those measurements helps us give the best recommendations for how to move forward! We’re also happy to continue this conversation over email if you’d like, as we can go a bit more in-depth with your project.
We really appreciate you reaching out and are eager to help get to the bottom of this!
Kindly,
Sam
Am i loading the page wrong or this answer is missing part of an answer? I have the same question, it is normal to decrease only in the first section?
Hi Agnese,
Thanks so much for asking about the decrease rounds! In Rounds 1 and 2, you will decrease four times total in each round by repeating the entire section in the brackets two times- once on each side of the marker.
I hope that makes sense! Please let us know if you have any other questions!
Kindly,
Andrea
Hi Andrea, I’m clearly missing something, because that is how I interpreted the pattern, but the shape is not turning out at all how it’s supposed to. It doesn’t look like I’m decreasing enough, to decrease 1 stitch before each of the two markers per row, I’m decreasing only 2 per row, not 4. I decrease 4 in rows 1 and 2 combined, which doesn’t seem right because at the end, decreasing just with row 1, the stitches are supposed to go from 8 to 4. What am I missing? Should I K2tog right after the slips after each marker too?
Hi Ashley,
I’m sorry that you’ve run into trouble with your decreases, and I’m happy to help clarify.
Here’s the section of the pattern we’re referencing:
If we were to expand these instructions, it would read as:
Rounds 1 and 2: [Slip slip knit, knit to 2 stitches before next marker, knit 2 together, slip marker],[Slip slip knit, knit to 2 stitches before next marker, knit 2 together, slip marker] (4 stitches decreased).
You should be working 2 SSK and 2 k2togs on both rounds 1 and 2. This should be worked once on each side of the marker, and should lower your stitch count by 8 cumulatively. You’ll reduce by 4 stitches on each round (two from your 2 SSKs and two from your 2 k2togs), for 4 stitches reduced overall.
I hope this helps! If you’re still running into trouble, please feel free to email us at [email protected].
All the best,
Hills
I’m a bit confused about this section.
“Without turning work, fold bottom left corner to top right corner so wrong sides are facing each other, forming a triangle. Then, being careful not to twist the stitches and starting at removable stitch marker, pick up and knit 48 (60, 78) stitches along selvage edge, at a rate of approximately 2 stitches per 3 rows. [192 (240, 312) total stitches]”
Once I pick up the 48 stitches along the selvage edge – what does it mean at a rate of approx 2 stitches per 3 row for 192 total stitches?
Hi Kari,
I’m so sorry to see that you’ve run into a bit of a hiccup here. I could see how these instructions might seem a bit unclear, and I’m happy to help clarify!
These directions mean that when you are picking up your 48 (60,78) stitches from the selvage, you should do so by picking up from 2 rows and skipping the third. This will help ensure that you pick up stitches in an even distribution throughout the edge.
I hope this helps. Please reach back out anytime!
Happy knitting,
Hills
Thank you! I’m well on my way. Excited to finish.
Hi, Thank you for this great pattern. I misunderstood the decrease instructions and decreased just two stitches in round 1 and 2 instead of 4 stitches per round. I’ve just completed row 3. Is it best to take those rows out or can I continue with the next 23 rows in the right way?
Hi Eleni,
Sorry to hear about those missing decreases, but it sounds like you’re on track to make the necessary fix!
The best way to move forward is tinking back to Round 1 and completing the 4 decreases as written in first two rounds. It’s better to rework these rounds since those decreases are essential to the shape of the bag, and missing any could result in a bit of a wonky edge that doesn’t match the opposite corner of the bag.
I hope this helps you get back on track, but please reach back out if you have any other questions!
Kindly,
Sam
I wish there was a crochet pattern comparable to this 😢
Hi Kelly,
Thanks for letting us know that you’d like a crochet version! I think that would be amazing too, and I’ll definitely pass this idea along to our team.
In the meantime, I hope you’ll check out the crochet patterns on our Create page! We’re always happy to help, so please reach out if you ever have any questions.
Happy crafting,
Allison
Hello Purl Soho,
Would like to knit the simple knot bag in Field Notes cocoa bean and mountain pool. Is this possible? Resulting in a side and tie of each color? Any thoughts and direction of how to knit this? Would it work if knitting begins in one color then cable cast on in the other color?
Thank you
Shirley
Hi Shirley,
Knitting this bag in two colors would be so fun! The simplest way to do with would be cast on and work the square in one color. Then switch colors at Pick Up + Join In Round. If you locate the diagonal line that goes from between the two ties to a bottom corner in the photos, this method will result in the smaller triangle in one color and the larger triangle in the other color. We’d love to see it if you give it a try!
I hope this helps! Please let us know if you have any other questions!
Kindly,
Andrea
This is an amazing pattern. I am obsessed with these bags. I have made them with three of the Field Note colors and am wondering if I could make them with other yarns like your Japanese Denim cotton or any other yarn that you carry and recommend.
Thank you for making knitting so fun with all your patterns, yarns and very friendly staff.
Hi Hilda,
Thank you so much for your kind words! We are so excited that you love the Simple Knot Bag pattern as much as we do! Based on Field Notes’ recommended gauge of 5.25-6 stitches per inch, Japanese Denim Cotton would not be an equal swap for this pattern since it is a sport weight yarn.
We do have a few great alternatives in our lineup though! For a fully plant based yarn that will yield a similar result due to Field Notes’ Cotton/Hemp make-up we would recommend Cotton Chirp DK, Sketchbook Cotton, or Blackbird Linen. Lines that have plant based fibers, but will offer some body due to also having animal fibers include Morning and Plein Air.
Happy Knitting!
Mia
Thank you Mia very much for the yarn recommendation. I will for sure look them up 🙂
I’m new to knitting, and I have a quick question: I’ve just finished turning my work. I’ve finished cable casting on 60 stitches, placed a marker, and cable cast on 60 more stitches. I’ve moved the bottom-left corner to the top-right corner and formed a triangle. I have my work set up like the example picture, showing your cable cast on work. Do I pick up the selvage edges with a double-sided needle, or with the needle where I finished my cable cast? I tried picking up with the needle where my cable cast ended, but it feels unnatural (or I’m doing something wrong). Also, do I pick up the stitches on the inside of the selvage edges? Thanks for your help.
Hi Julie,
Great question! You will be picking up the stitches in the selvedge using your working needle that you have just finished your cable cast-on onto. This is because once these additional 60 stitches are picked-up, you will work in the round across the total 240 stitches.
We have a very helpful video Picking Up Stitches Tutorial that may help you visualize how to pick those stitches up a bit better. Just scroll down to the Along A Vertical Edge: Stockinette Stitch section to view the video.
If you have any further questions, we’d be happy to help if you email us at [email protected].
Best,
Mia
My gauge is 22 sts in 4”. So my initial square won’t actually be a square if I stop at the 8” specified by the pattern. Can I continue anyway or do I need to start over with smaller needles ? I have already knit about 5” of the opening square.
Hi Dorian,
Thanks for writing in! Based on your differing gauge, you will want to knit your foundation square to 9” instead of 8”. From there you should be able to continue as written except for the selvage pick up section. Instead of picking up approximately 2 stitches per 3 rows, you may need to adjust this rate so you’re only picking up the recommended 48 stitches. To do this, you can divide 48 by the number of rows you finish with to get your new ratio.
I hope this helps, but please let us know if you have any more questions!
Happy knitting!
Mia
According to the pattern there are 4 stitches decreased in both row and row 2. But as the pattern is written only two stitches are decreased as there is slip slip knit at one marker then knit two within 2 stitches of the second marker and then knit 2together. Surely a slip slip knit and a k2 together is needed on either side of the two markers. Or are there 4 markers? Confused.
I hope you can give me some clarification as I love the color of yarn I purchased and love the style and would like to knit more.
Thank you,
Lori
Hi Lori,
I’m sorry to read that you’ve run into some trouble here! I think I see where the hiccup may be, and I’m happy to clarify!
For Rounds 1 and 2, there should be 2 stitches decreased per round, or 4 stitches decreased in total.
I can totally see how this could cause some trouble. If the rounds were split into two separate lines, with “[4 stitches decreased]” at the end of each round, then you would be decreasing 4 stitches in each round for a total of 8 stitches decreased.
I so hope this helps. If you’re still running into trouble, please feel free to email us at [email protected].
All the best,
Hills
Hi! This bag is adorable. I am confused about the finishing. When I have completed the rounds and have 4 stitches left, do I just bind of those 4 or all the remaining stitches? And where do I start with the I-cord bind off? Thanks for the tip.
Hi Karen,
I’m sorry to read that you’re a bit stuck finishing your Simple Knot Bag! Congratulations on nearing the finish line, and I’m happy to help clarify how to complete this project.
You’ll want to cut the yarn and thread the tail onto a tapestry needle, then draw the needle through the remaining stitches and pull taut. Then, bring the tail to the inside of the bag to weave it in on the wrong side. Those bound off stitches are not used for the I-Cord Bind-off.
You’ll want to start your I-Cord by casting on 2 stitches. Then, beginning from either pointed tip along the selvage edge of your bag, pick up and knit around the opening. Aim for about 2 stitches every 3 rows along the vertical edges and pick up every stitch along the horizontal cast-on edge. Once you’ve got your picked up stitches, join your work in the round and finish up by binding off the stitches using the I-Cord Bind-Off.
I hope this helps, but if you’re still running into trouble, please feel free to email us at [email protected].
All the best,
Hills